Run a Survey
Learn how to define the scope of a survey and make necessary configurations to run a survey in LeanIX.
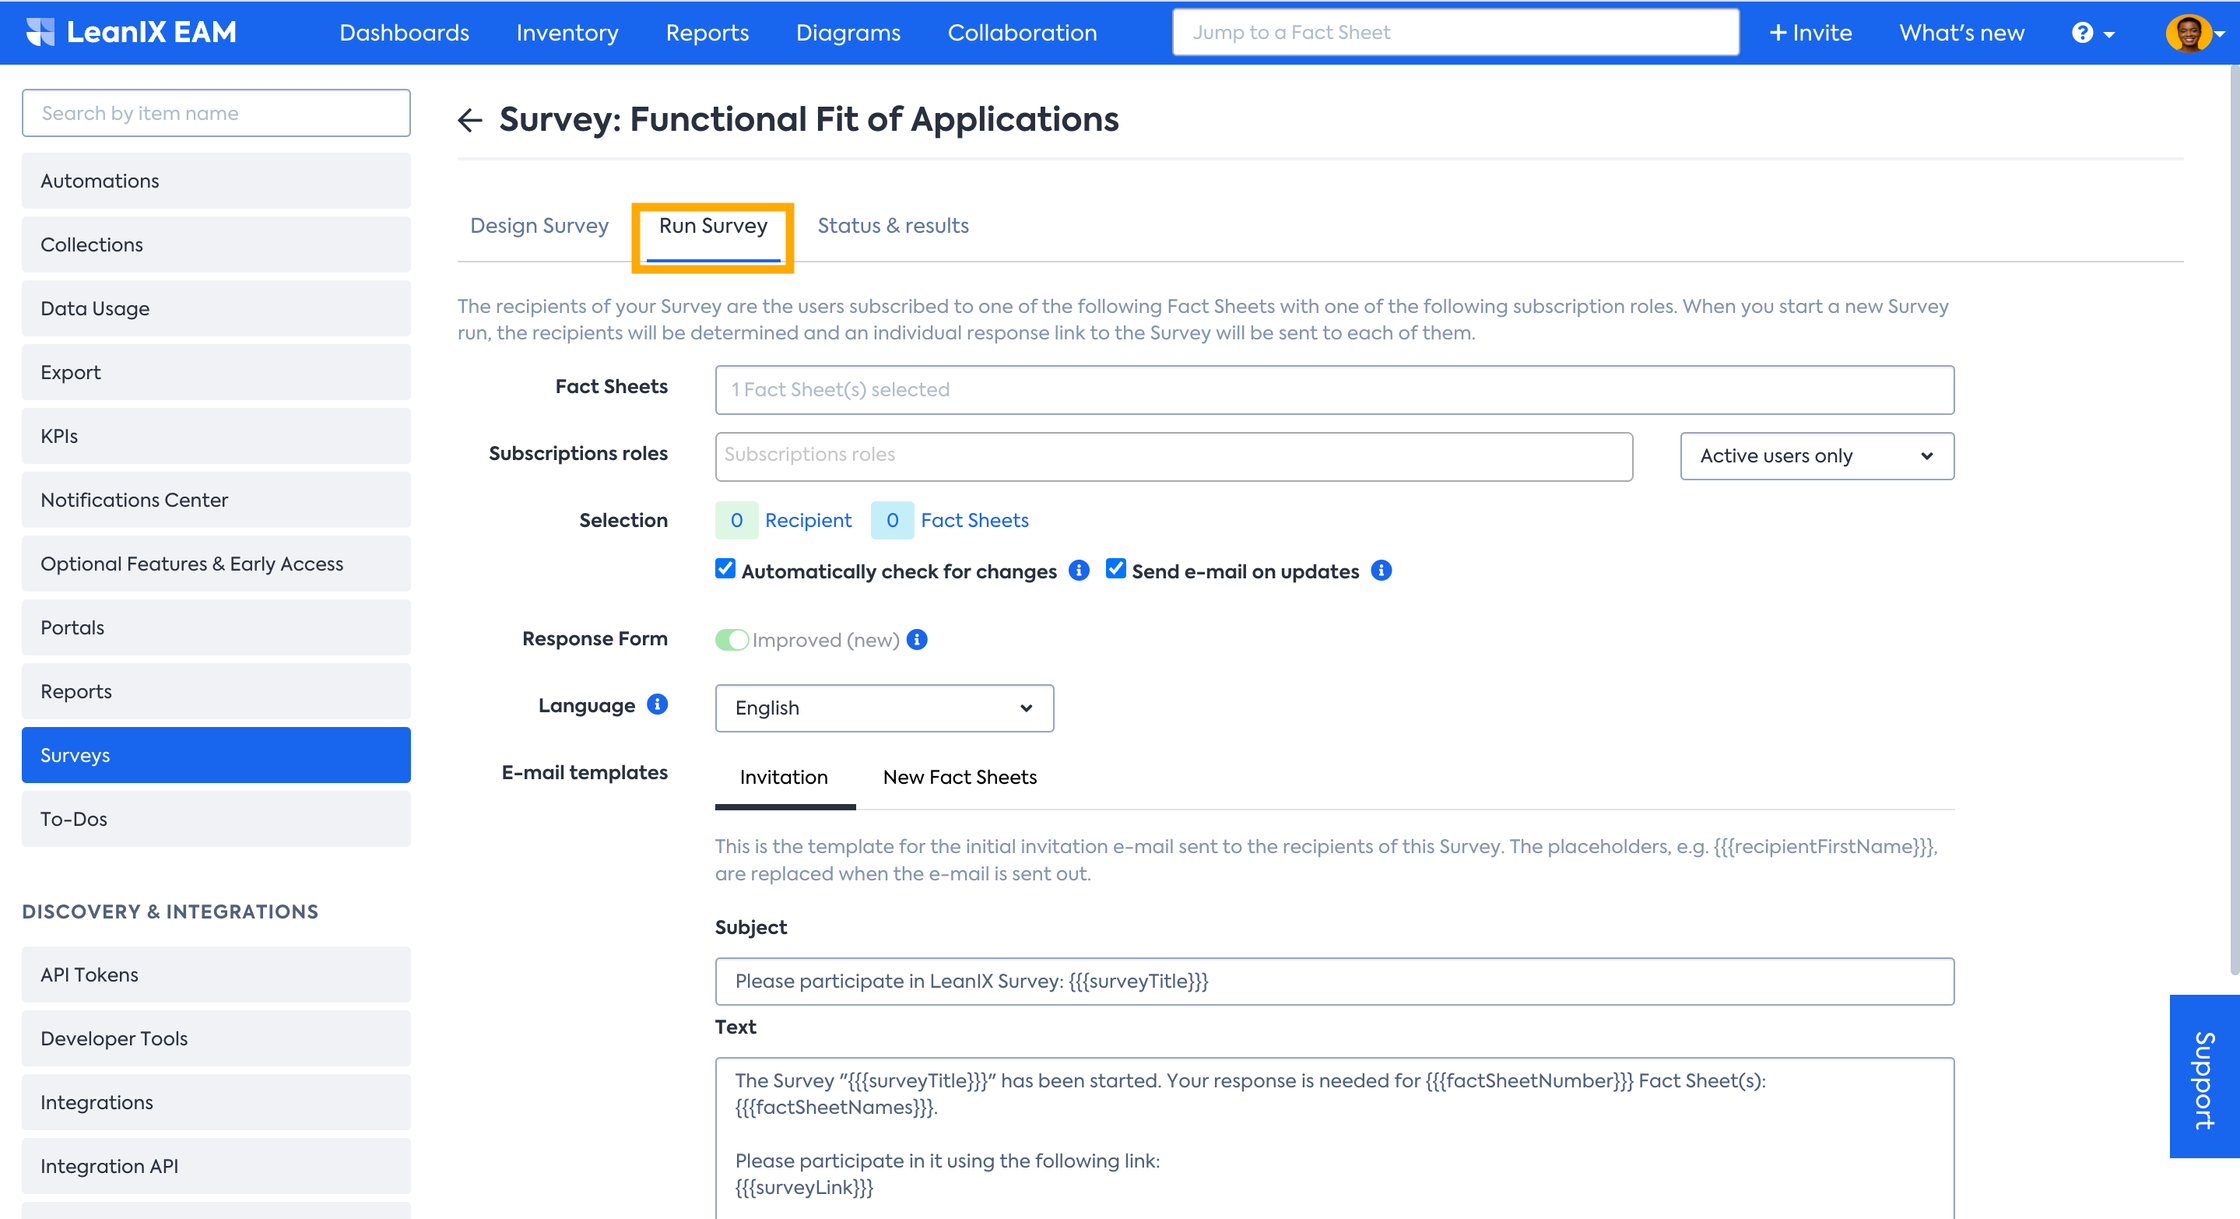
In the Run Survey tab, you define the scope of your survey by adding a set of recipients and relevant Fact Sheets and configuring general survey settings.
Define scope and configure survey settings.
Define the Scope of the Survey
Fact Sheets: Clicking on this field brings you to a standard Fact Sheet search pane. There, you can add relevant Fact Sheets individually or use filters based on your survey's specific needs.
Subscription roles: Refine the scope of recipients by subscription roles, by adding or removing relevant roles.
Refine the scope of recipients by subscription roles.
Every user can receive a survey regardless of their authorization role. When setting the subscription role, you can choose from two options listed below:
- Active user only: admins, members, or viewers roles that have the status of ACTIVE
- Active & invited users: admins, members, or viewers roles that have the status of ACTIVE or INVITED
If multiple users are subscribed to a single Fact Sheet, and a survey is run, it will be considered as closed as soon as the first user responds to it. However, other relevant recipients can edit and overwrite the previous respondent’s answer.
Attention
Starting November 1, 2023, support for Contacts (Fact Sheet Subscribers without LeanIX accounts or workspace invitations) in Surveys has been stopped. You can no longer create surveys with 'Contacts' as recipients. Starting from January 1, 2024, all survey links previously sent out to ‘Contacts’ no longer functions.
Best Practice
Introduce subscription roles based on your organization's defined roles. This ensures you can address specific individuals, such as an Application Owner, Solution Architect, or Data Security Officer, and not only the Responsible person.
Configure Survey Settings
Selection: This section gives you an overview of the number of recipients and addressed Fact Sheets. It also indicates how many Fact Sheets lack a relevant subscriber. Click on them for a comprehensive overview of recipients and referenced Fact Sheets.
If there are Fact Sheets within the scope of your survey, and if some of them have no subscription role associated, then the survey cannot be completed, as there is no specific person responsible for addressing the question. So, it is important to review the list of Fact Sheets without recipients and edit the subscriptions.
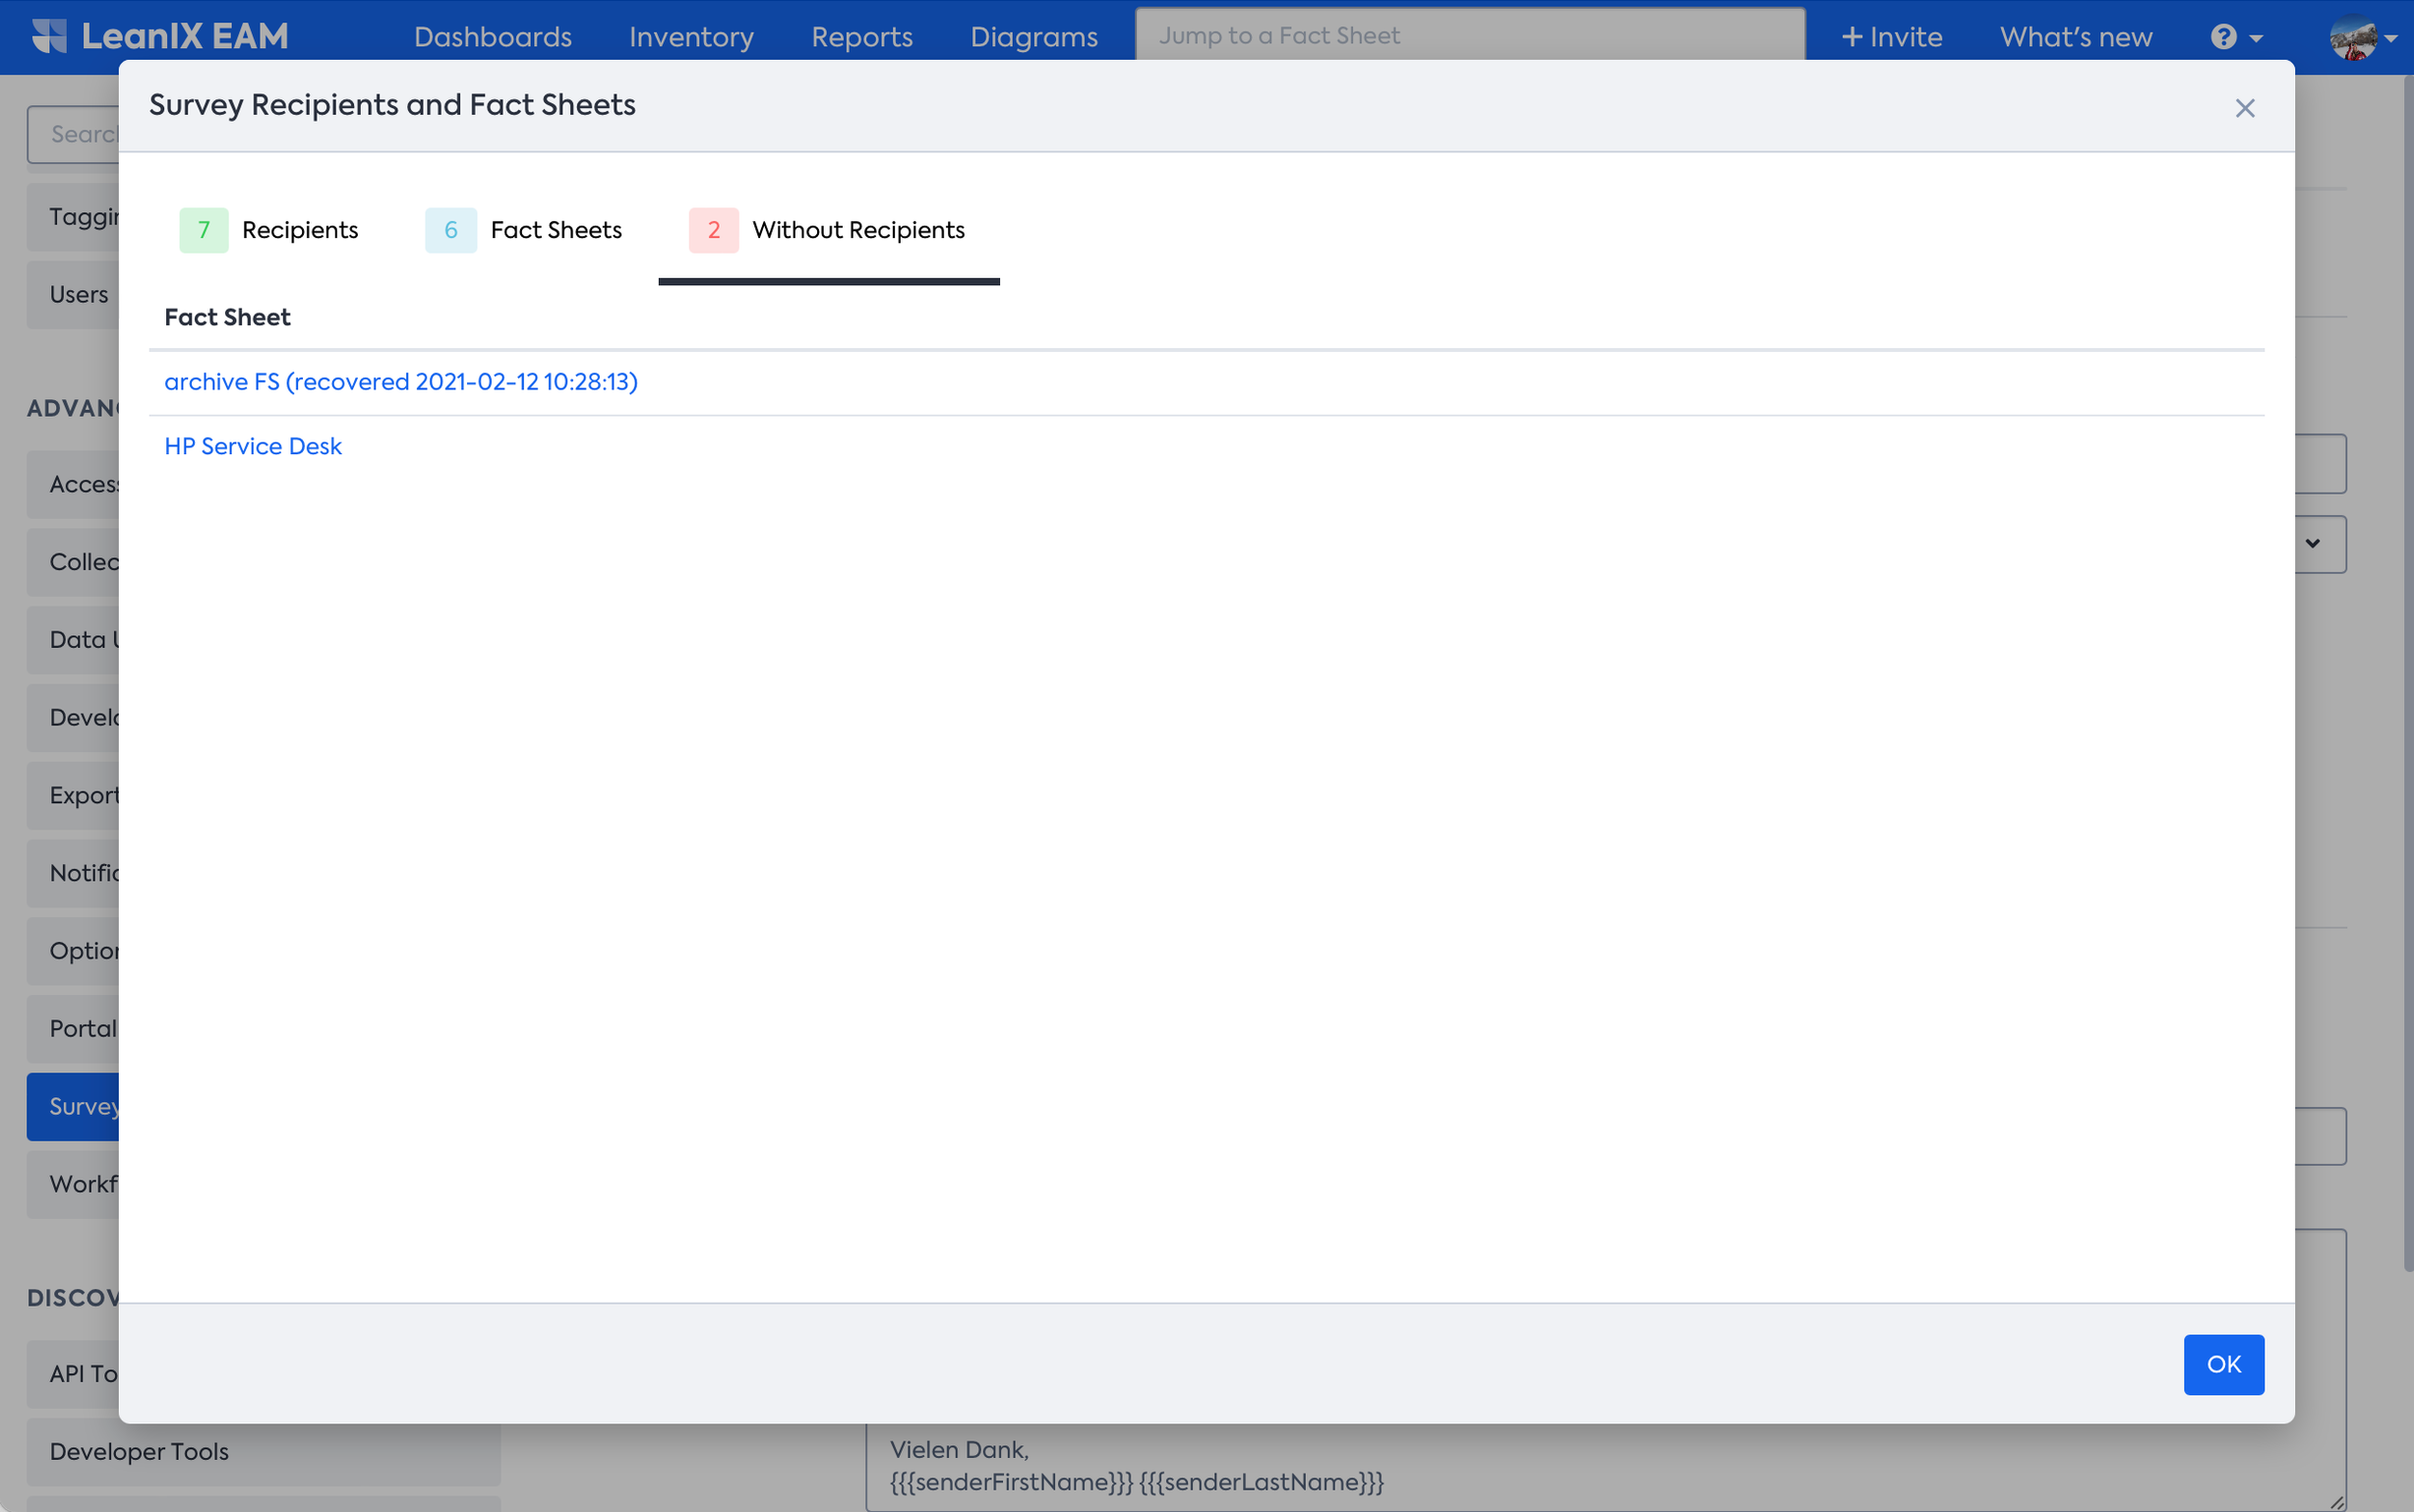
Overview of recipients and Fact Sheets
Two optional settings are available in this section: Automatically check for changes and Send e-mail on updates. Choose these options if you want to automatically update the survey scope and notify new recipients of any changes.
Response Form: Toggling the Response Form lets you choose between the new and old Survey Response Form. The Survey Response Form is what survey recipients receive and view when the survey is sent out. When creating a new survey run, the New Survey Response Form will be activated by default if no Fact Sheet Segments are included in the survey.
Note
Surveys which are already running will not be affected.
E-mail templates: Make use of a pre-configured mail template or insert your own text according to your needs. The placeholders, such as {{{recipientFirstName}}}, will be replaced with specific names and titles when the email is sent out. The following placeholders can be used in the email:
recipientFirstName: first name of the Survey recipientrecipientLastName: last name of the Survey recipientfactSheetNumber: number of involved Fact SheetsfactSheetNames: comma-separated names of all involved Fact SheetsaddedFactSheetNumber: number of newly added Fact Sheets to the SurveyaddedFactSheetNames: comma-separated names of newly added Fact Sheets to the SurveysurveyTitle: title of the Survey (as seen when answering the Survey)surveyLink: link which directs the user to LeanIX to answer the SurveysenderFirstName: first name of the Survey sendersenderLastName: last name of the Survey sender
Test Survey
After scoping and configuring your survey, you can test it by clicking on the Test Run button.
You can add an e-mail address and send it out to see how the survey looks to your recipients, ensuring that everything looks as intended before running the survey. You can test the complete user journey of a survey recipient, starting from the survey invite popping up in your inbox, viewing the survey form, filling out the form, and submitting the survey. If everything looks good, hit Run Survey to execute the survey.
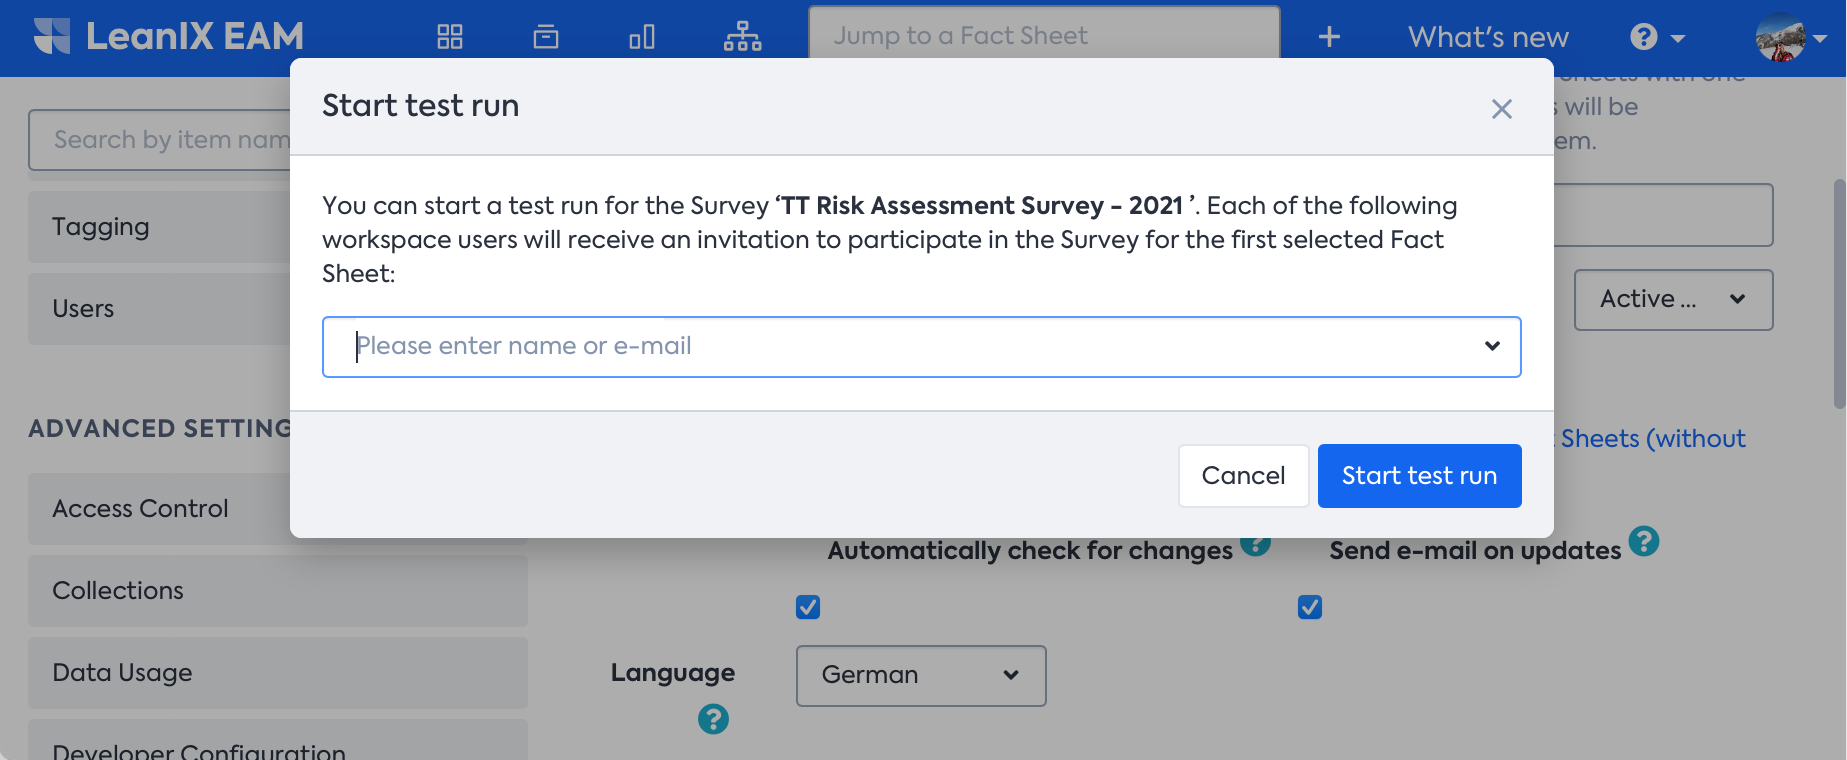
Starting a test run
The test run doesn’t update any Fact Sheet data and doesn’t create survey results. During a test run, only one fact sheet is displayed, as the survey response form remains the same across all Fact Sheets.
Updated 3 months ago