Microsoft Entra ID
Microsoft Entra ID is Microsoft’s cloud-based identity and access management service, which helps your employees sign in and access resources in:
- External resources, such as Microsoft 365, the Azure portal, and thousands of other SaaS applications.
- Internal resources, such as apps on your corporate network and intranet, and any cloud apps your organization developed.
Integration details
- Integration categories:
- Single Sign-On Systems (SSO)
- Authentication mechanism:
- REST API - OAuth
Discovery Capabilities
| Available capabilities | Entity description | EntraID resource |
|---|---|---|
| SaaS Discovery | SaaS discovery is the process of automatically identifying applications. | servicePrincipal |
Set up Microsoft Entra ID
Register a new application in Microsoft Entra ID
- Sign in to the Azure portal with an Azure administrator account that is also a member of the Global Administrator directory role in your Microsoft Entra ID tenant.
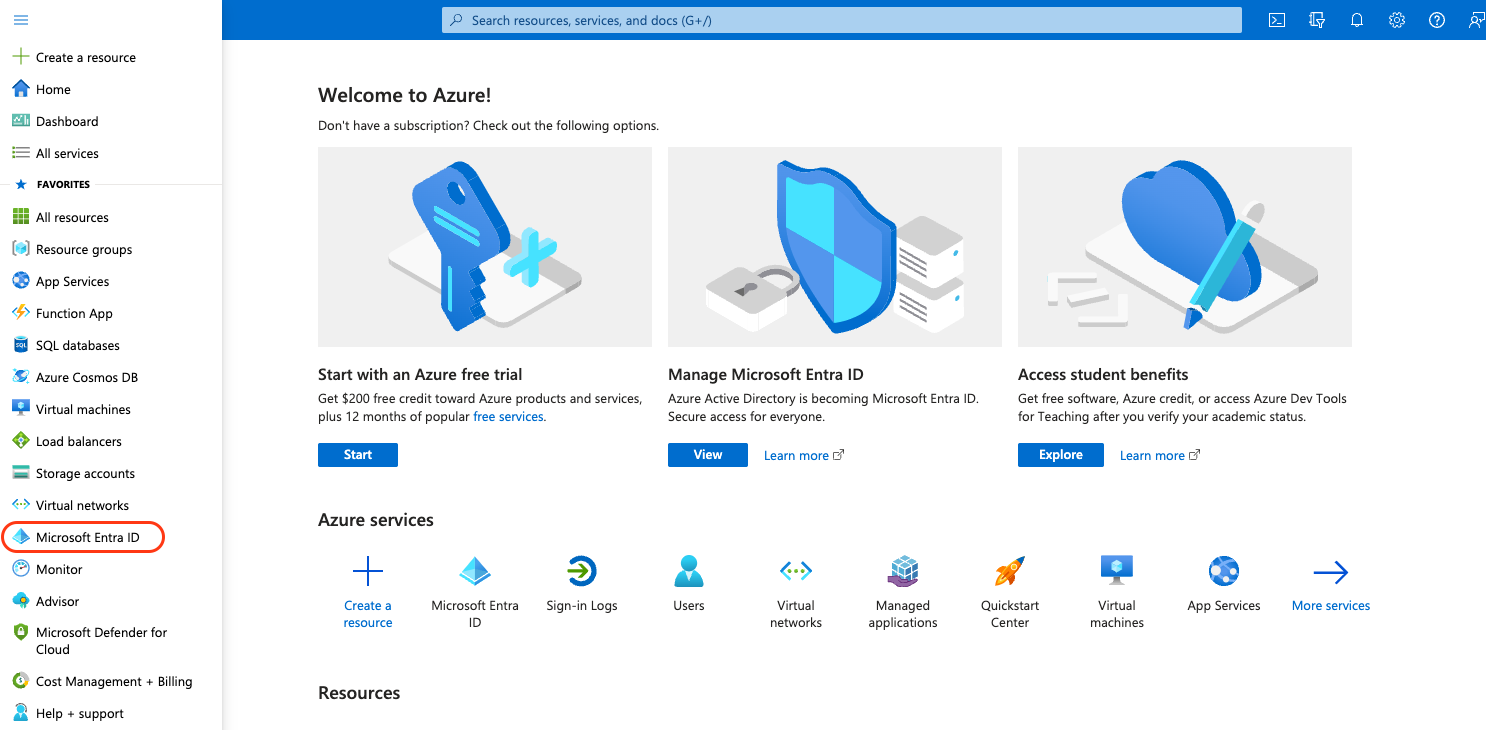
- On the left navigation pane, click Microsoft Entra ID.
-
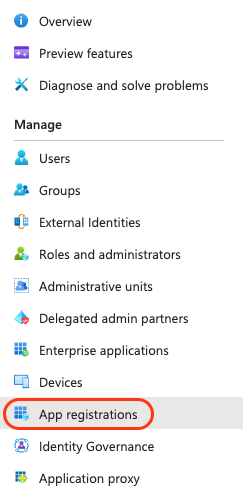
On the Microsoft Entra ID page, click App registrations.
-
On the App registrations page, in the toolbar on the top, click New registration.

-
Register an application page opens, perform the following steps:
- In the Name textbox, type
LeanIX SaaS Discovery Integration(it is just a label so it can be anything that will make you identify it relates to LeanIX integration). - Under Supported account types select
Accounts in this organizational directory only (Default Directory only - Single tenant). - Click Register at the bottom of the screen.
- In the Name textbox, type
Grant permissions to the application
-
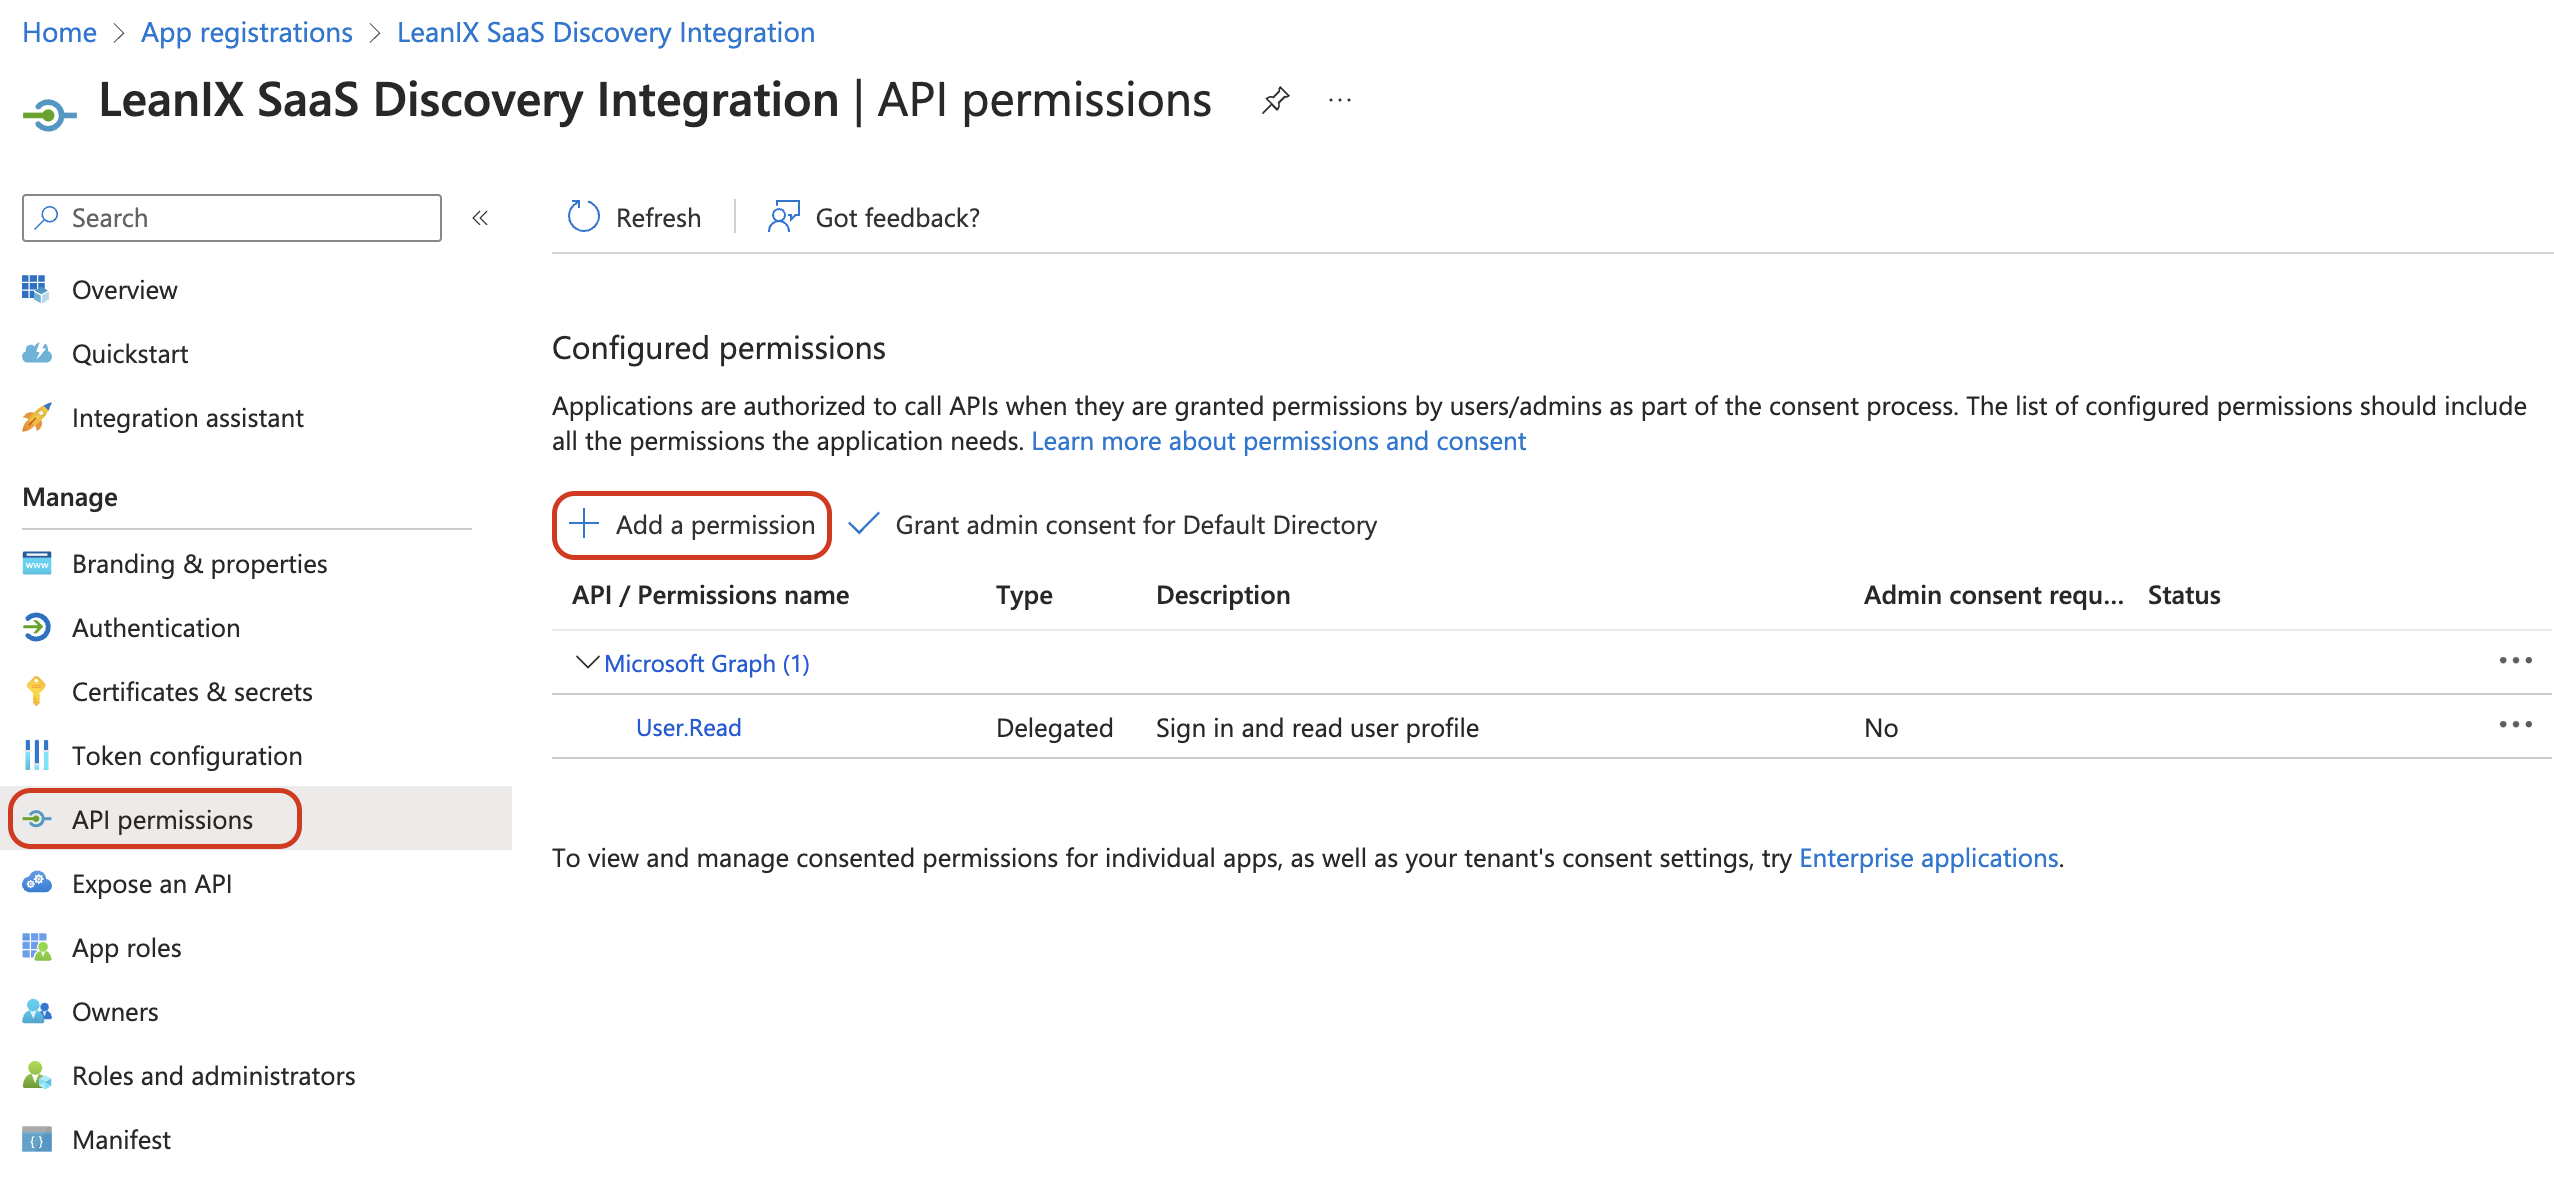
Now that we have the application we need to grant permissions, in the left menu click API permissions.
-
Click the Add a permission button.
-
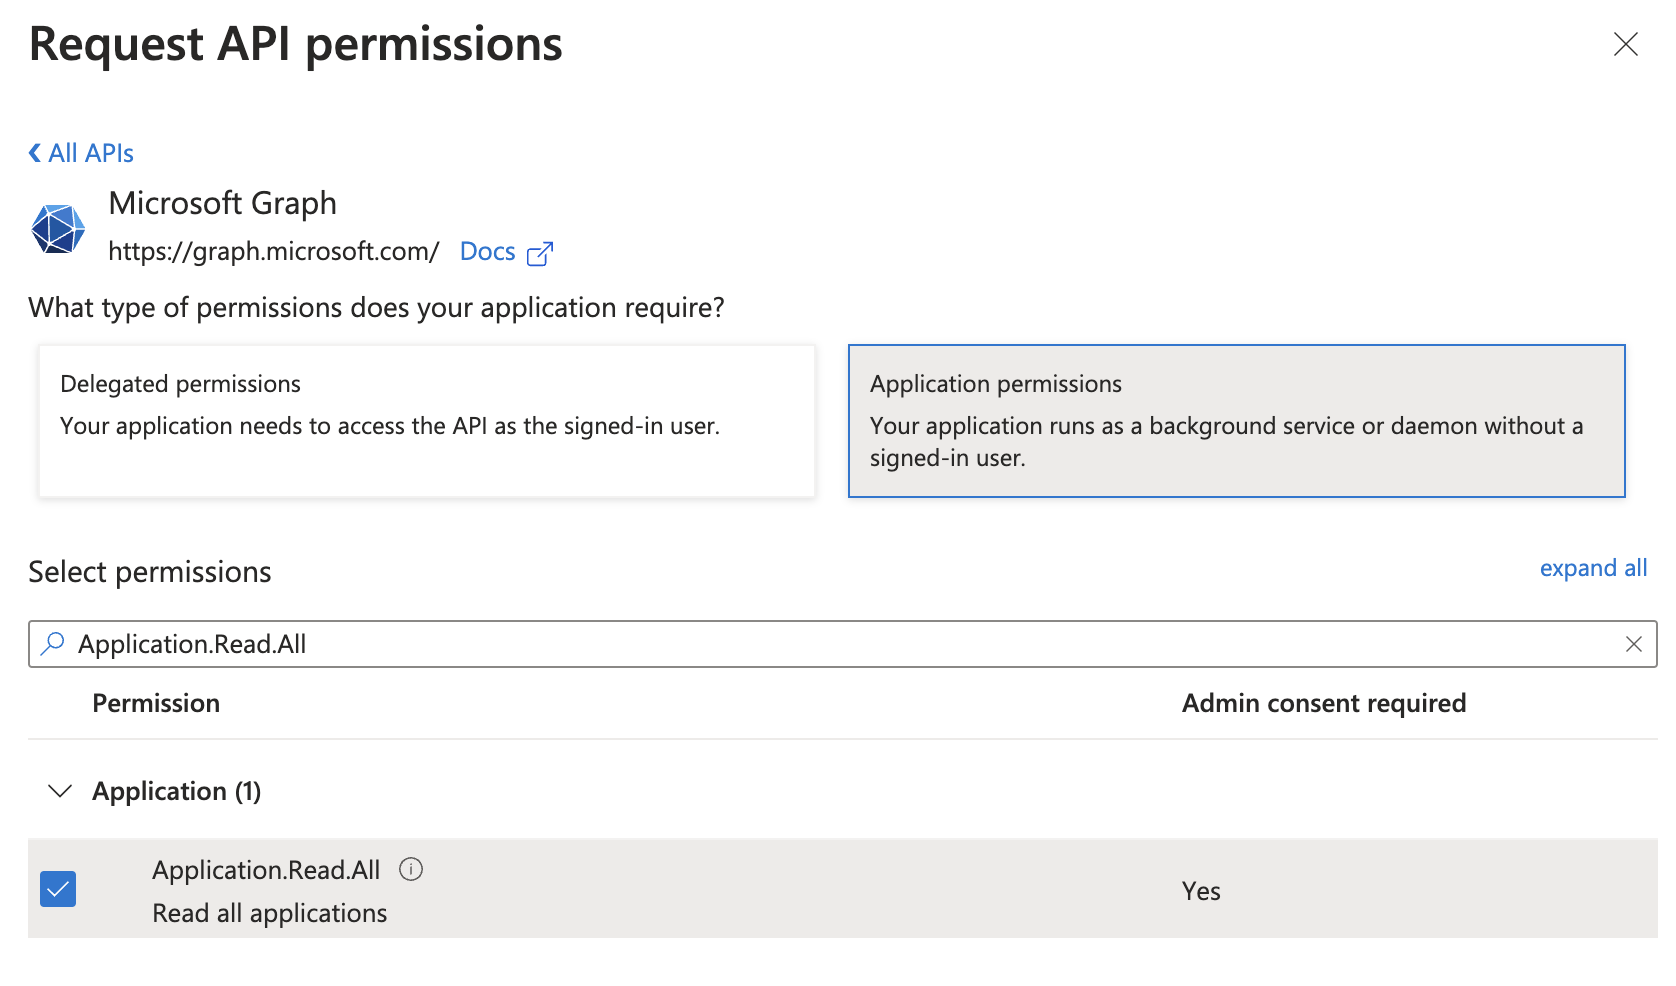
The new configuration panel Request API permissions will display on the right, select the Microsoft Graph API, pick Application permissions, and search for Application.Read.All.
-
Click on the Add permissions button at the bottom to assign permission to the LeanIX application.
-
Click on the Grant admin consent for Default Directory button to enable configured permissions for the application

- Next, click Yes to grant consent for the requested permissions.
- The permission status indicator in the API permissions page will change to approved.
Gather configuration settings
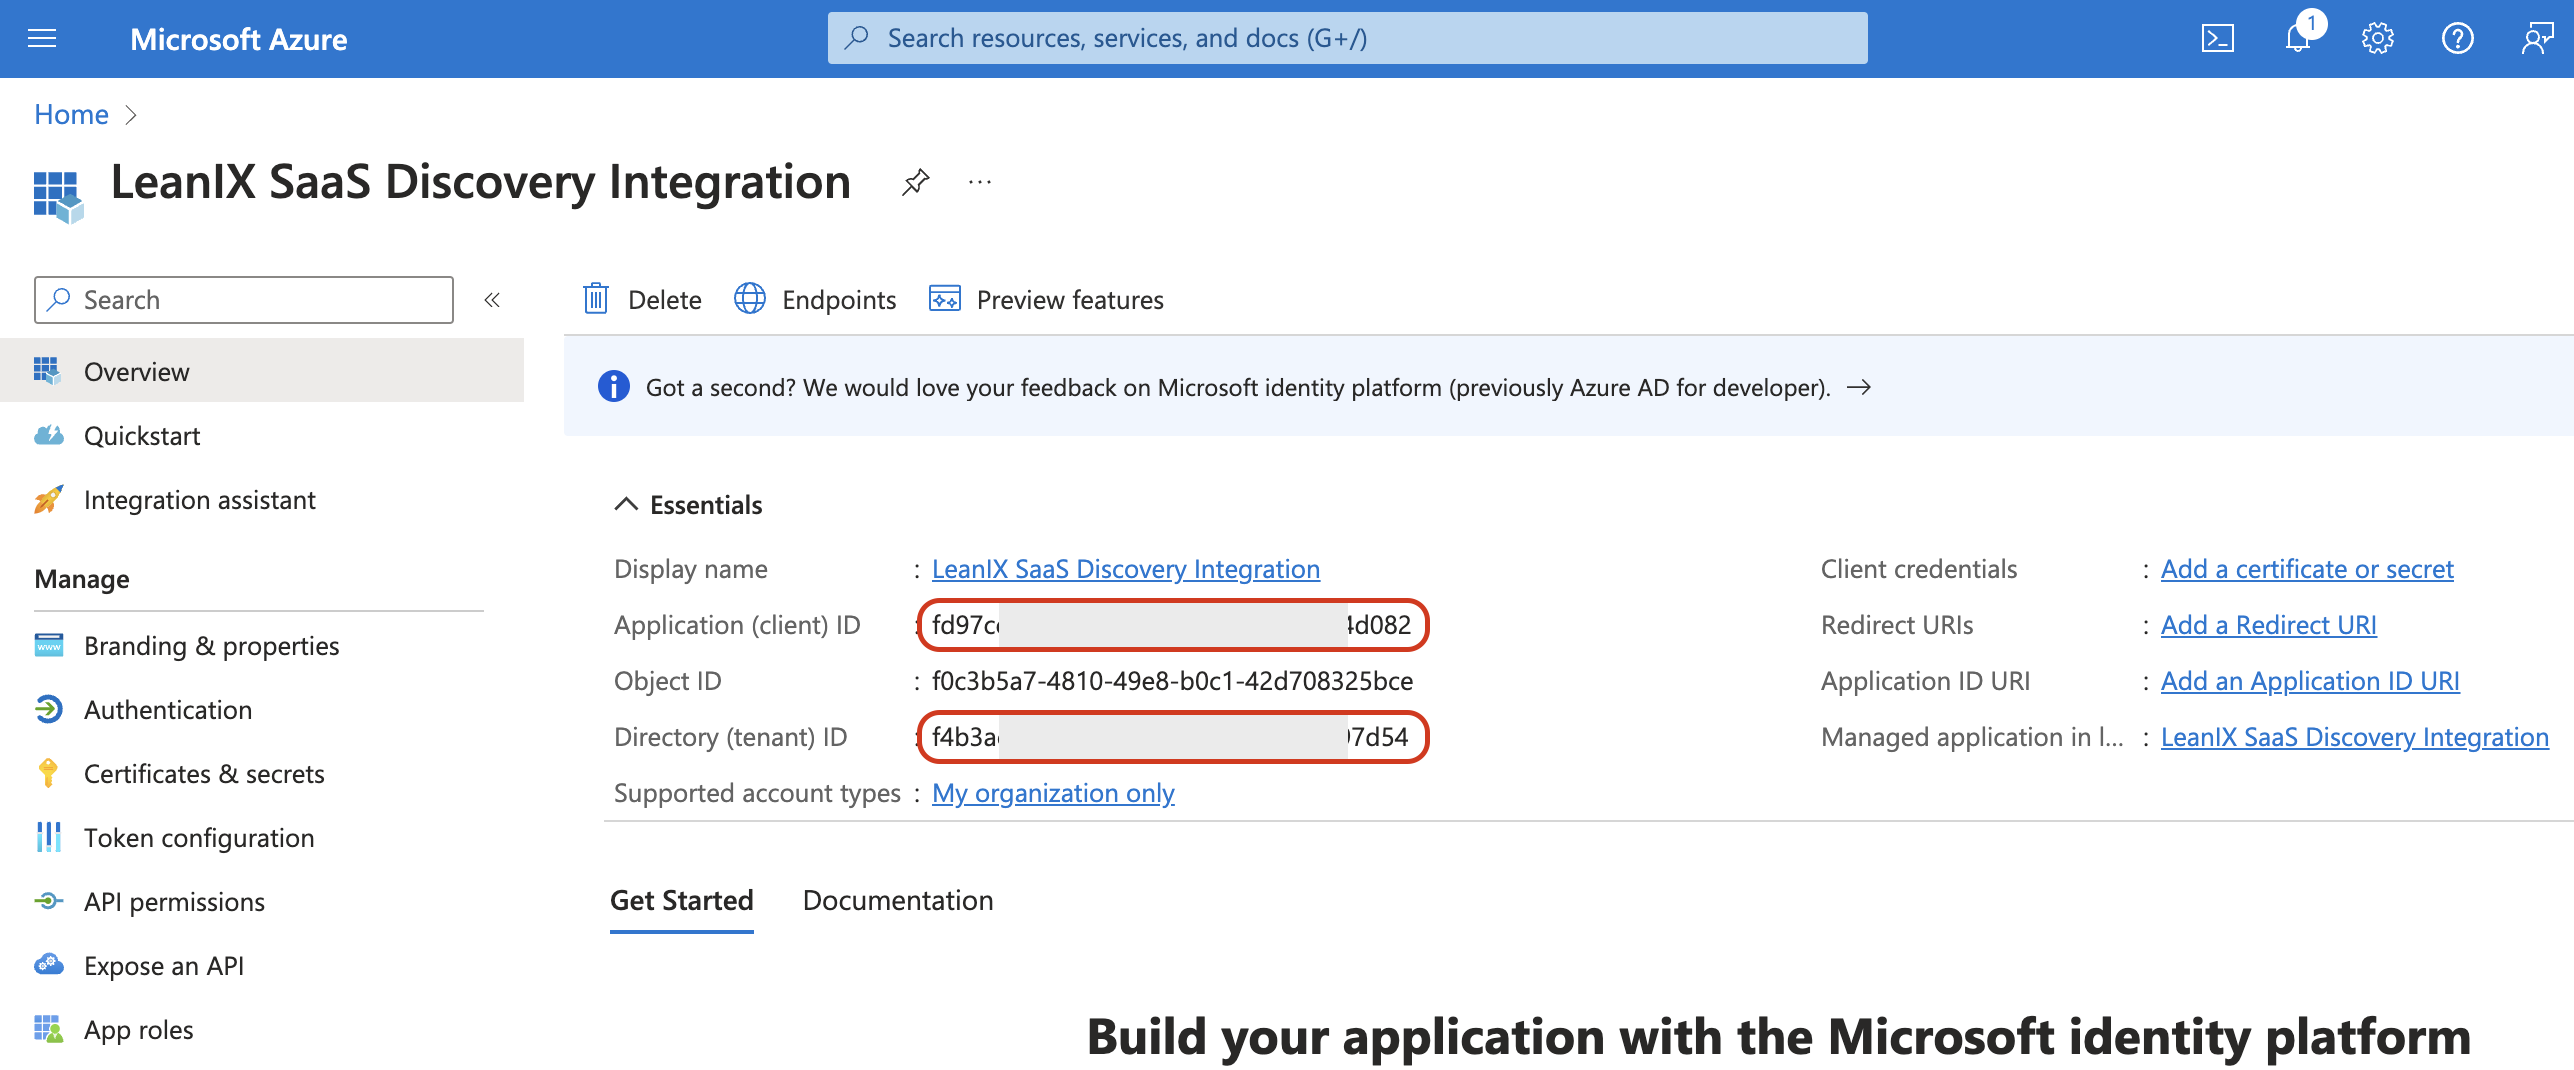
-
Return to the application overview section (App Registrations > click on created app) from where you will need to grab the following identifiers: Application (client) ID and Directory (tenant) ID.
-
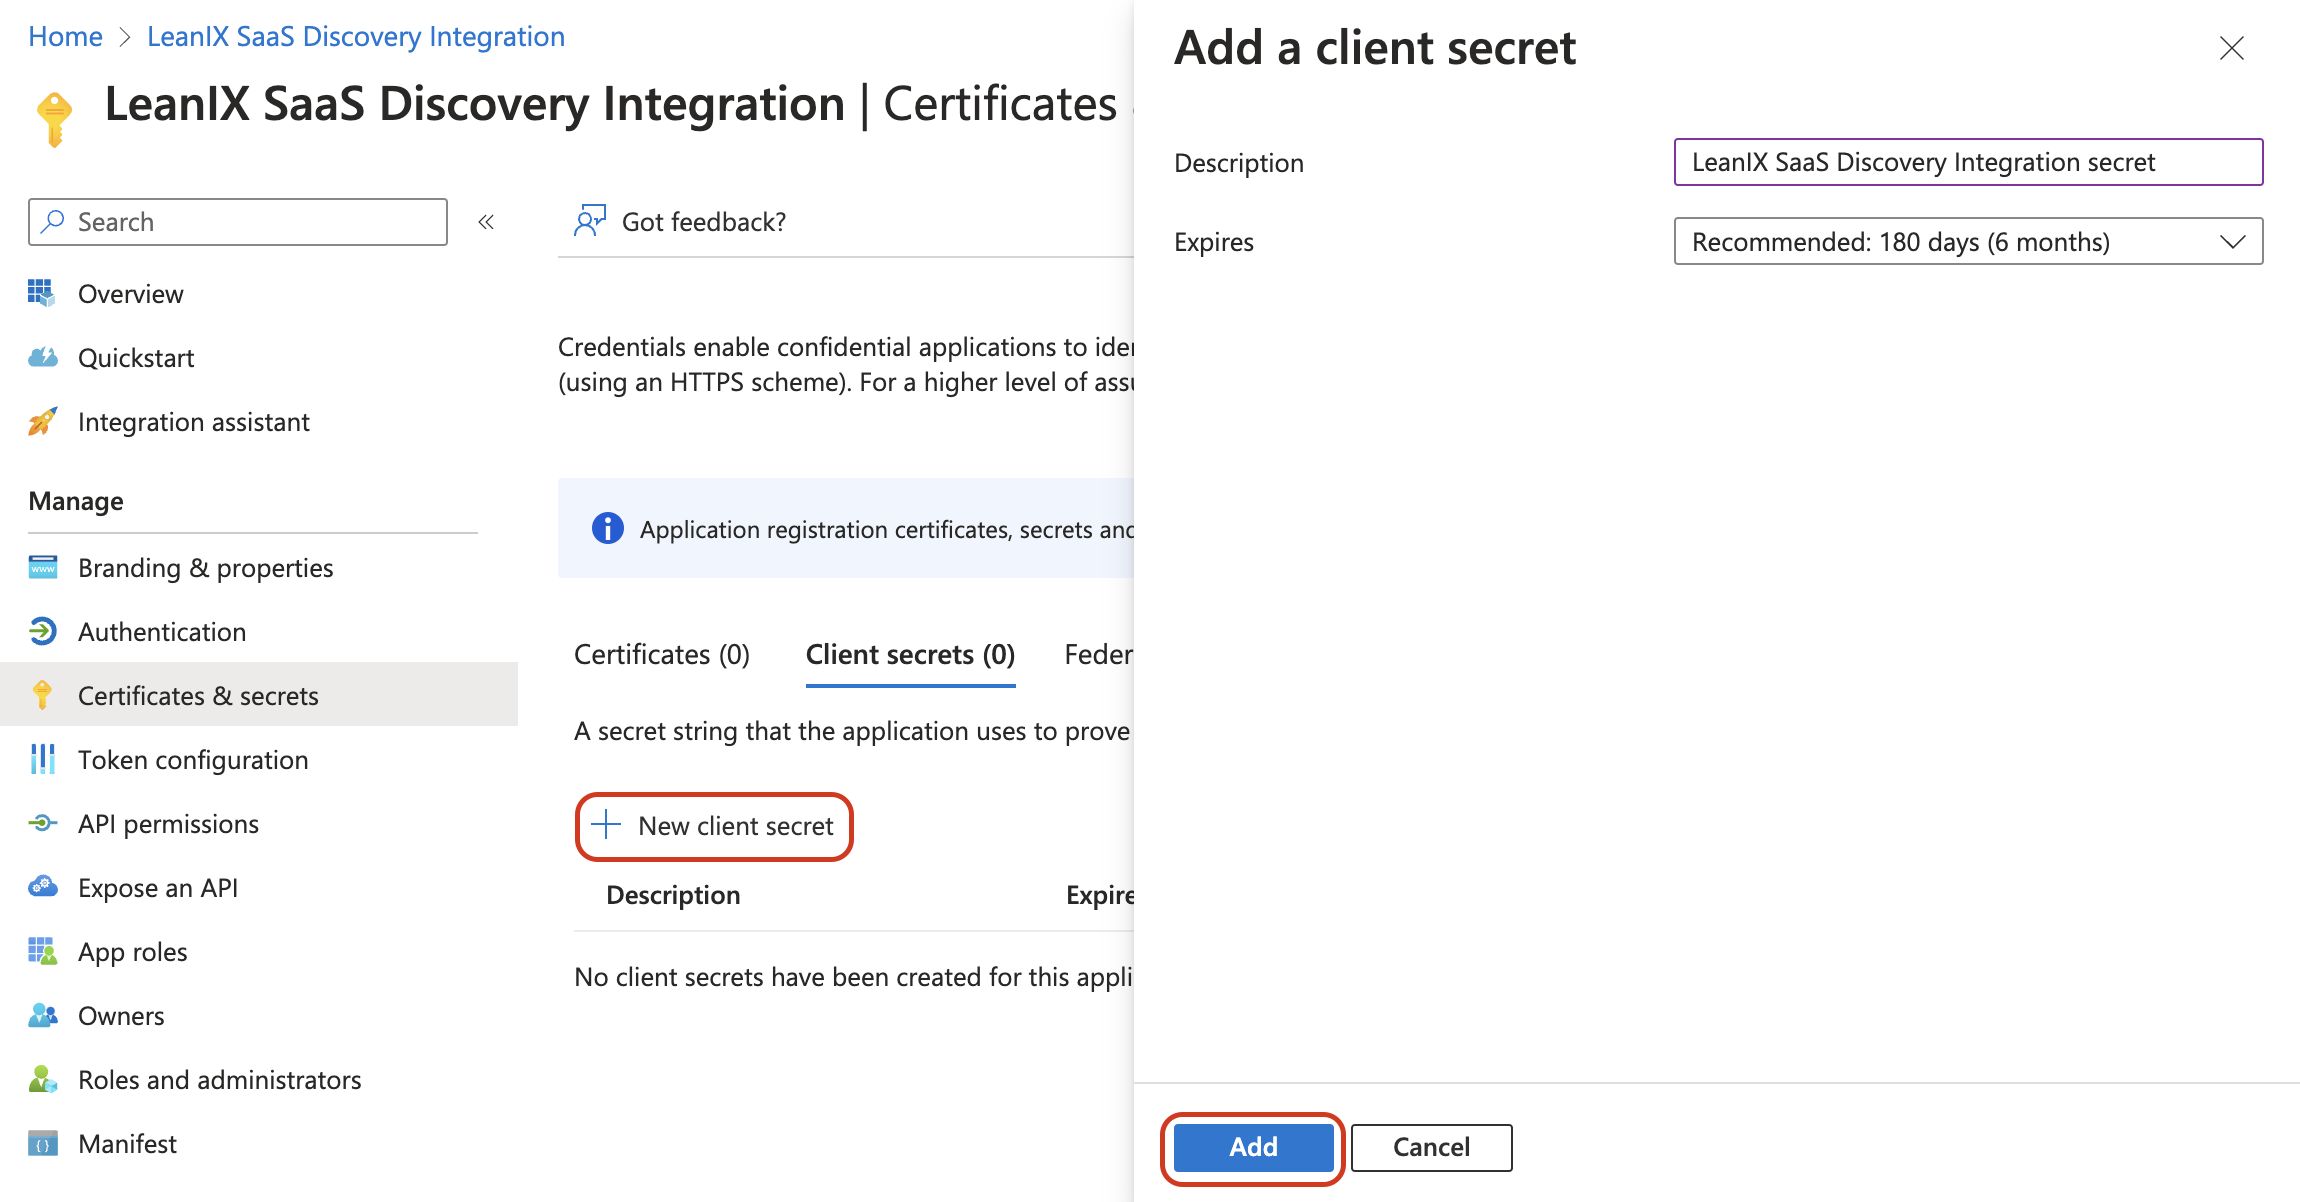
In the left menu, navigate to Certificates & secrets to generate a client secret, also called the application password.
-
Click on the New client secret button to create a new password.
-
Please choose the description for the secret (e.g.
LeanIX SaaS Discovery Integration secret) or leave it empty -
Select the expiration length of the secret. Once the expiration date of the created client secret is reached, you will have to create a new one and reconfigure the integration in the LeanIX application.
-
Click Add
-
-
Copy the Secret Value to your clipboard.
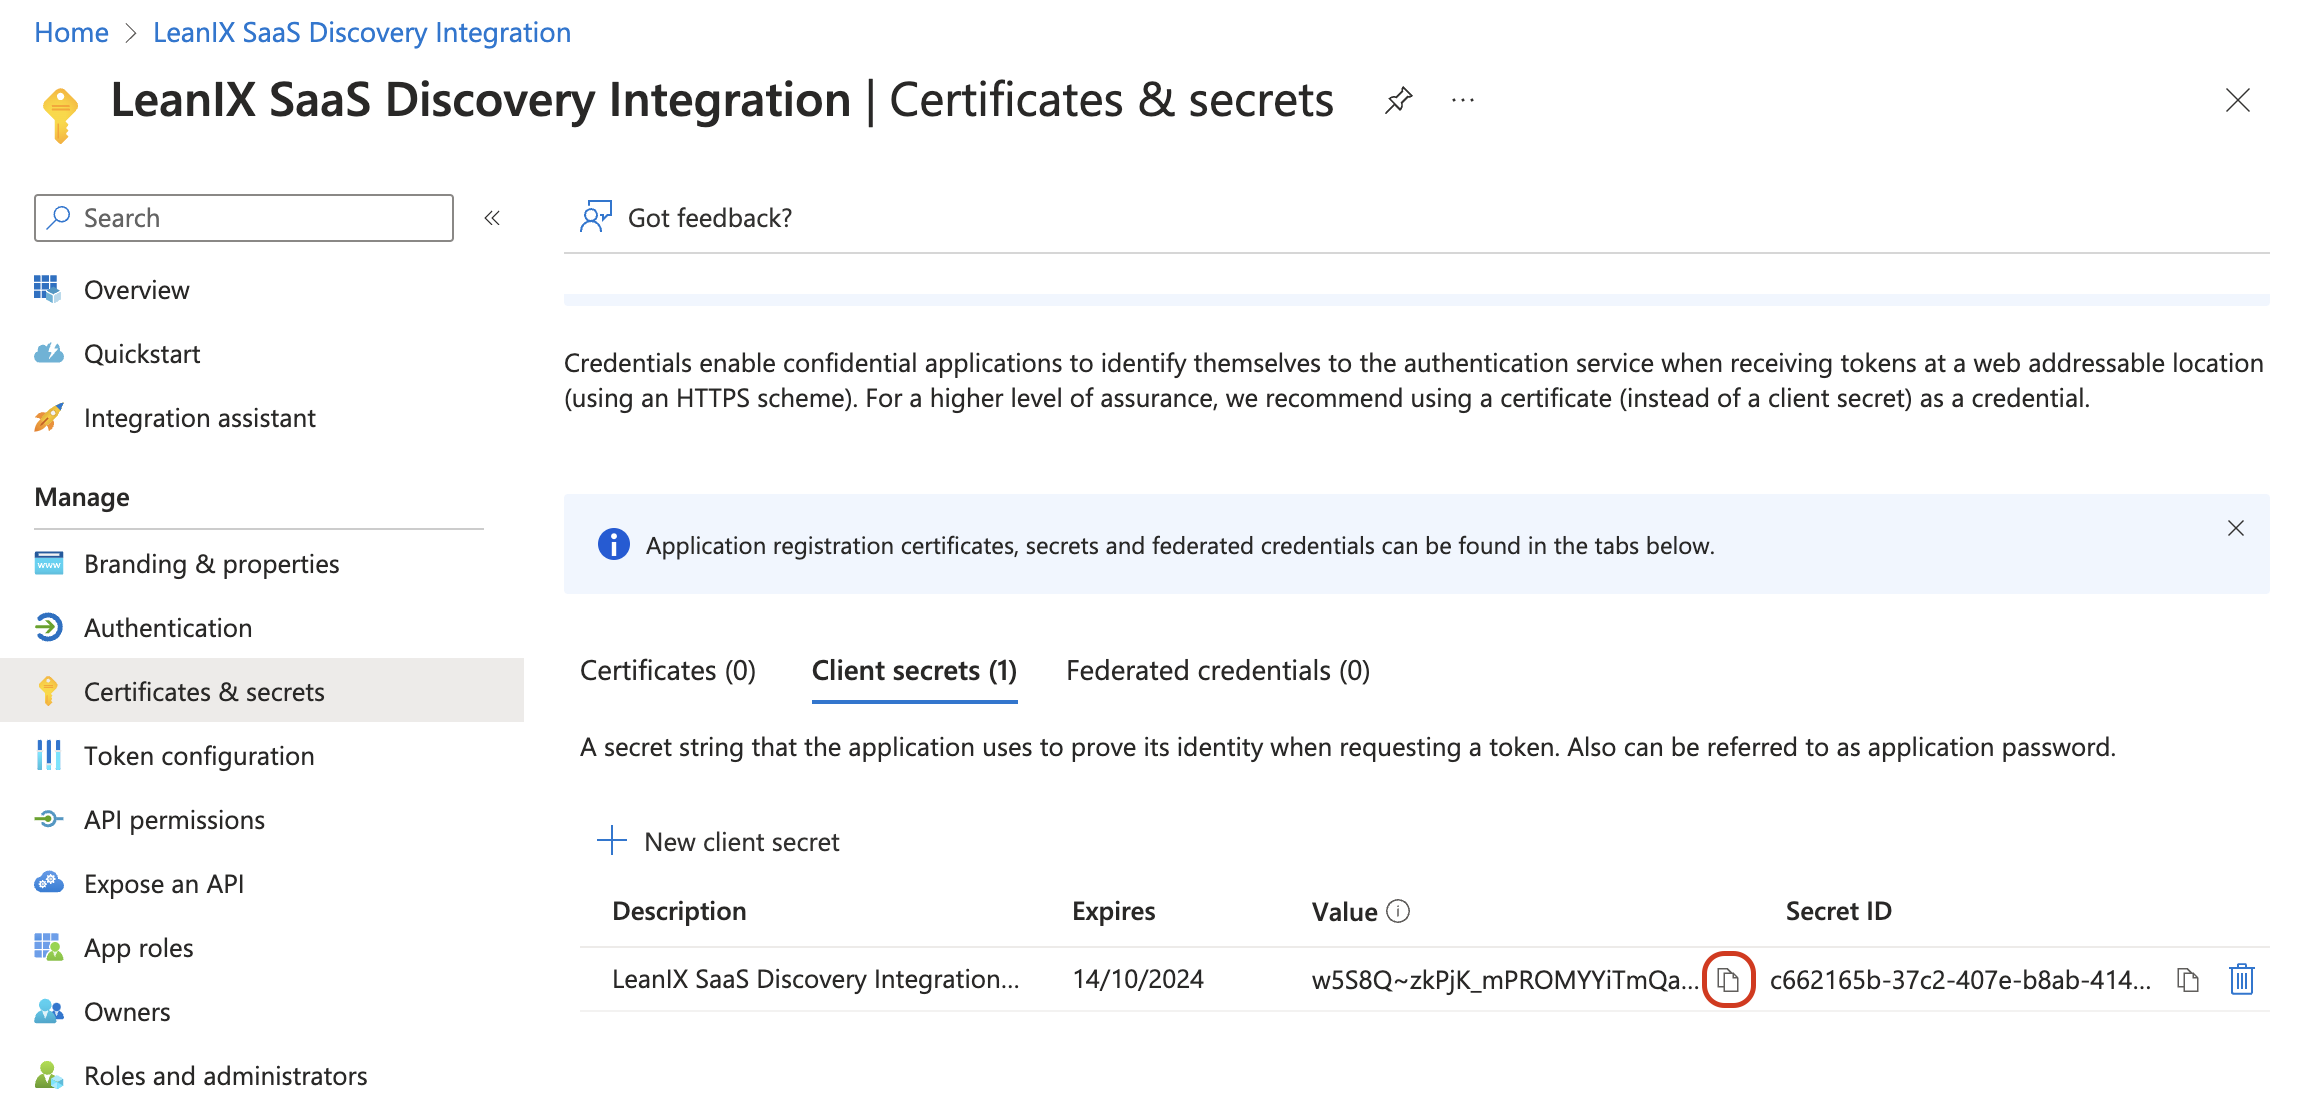
Store the secret value
Please make a note of the client secret value as soon as it is revealed. It will be masked when you navigate away from the Certificates & secrets panel.
This value needs to be added to LeanIX under Client Secret.
Pass configuration values to the LeanIX app
-
Proceed to LeanIX and input the credentials you have generated on the Azure Admin Portal.
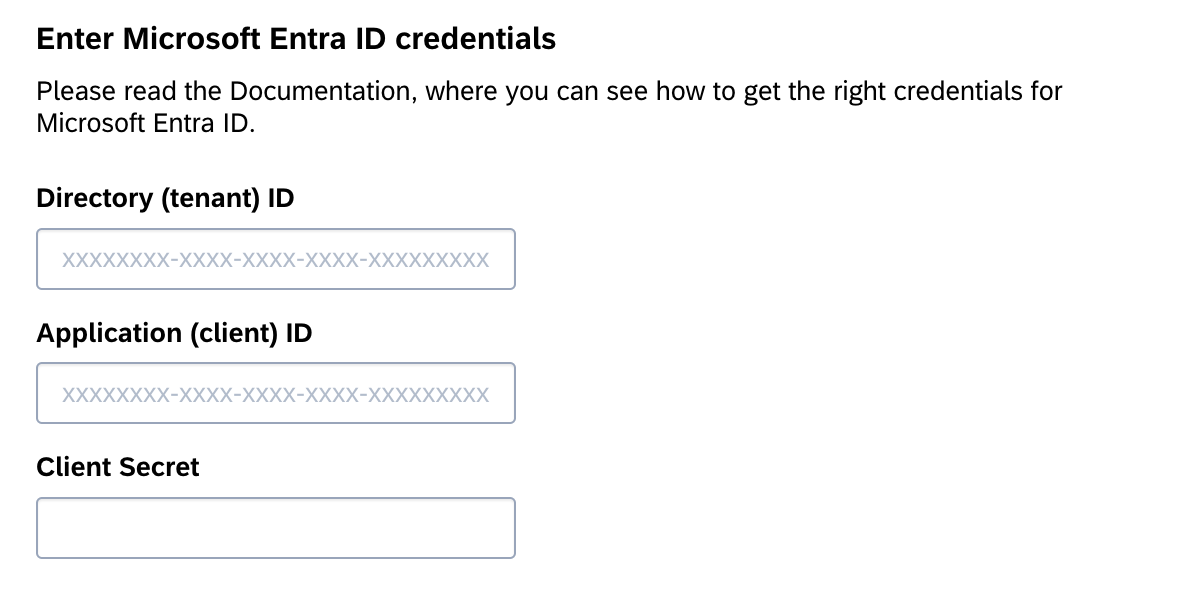
-
Click Finish and wait for the connection to be established.
Updated 9 days ago